Diary of a lockdown home brewer: Part 1: equipment - what's the drill?
and live on Freeview channel 276
‘Isn’t it just one of those ‘mix it with water, leave it in a bucket and voila’ sort of things?’ a colleague said to me after I had been asked to write about my experience homebrewing.
No. No it’s certainly not, and you are about to see why.
Just to warn you in advance, this series of articles I am publishing is about my first homebrew experience during which I will be making a Christmas stout.

Advertisement
Hide AdAdvertisement
Hide AdI will also be offering tips, mostly on what NOT to do given my experience so far. Each article is going to be a bit like that Twitter trend - ‘how it started’ followed by ‘how it’s going.’
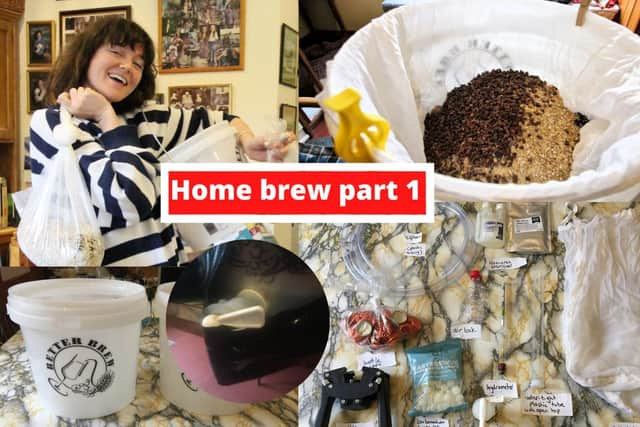
This first article is about equipment. It all started beautifully with neatly laid out kit and smiles, but was then shortly followed by a DIY disaster and tears, as you will see in the photographic evidence. I should probably put a disclaimer on here saying this information is for beginner brewers only so not to offend the experts.
I am going to be straight up - I have slightly cheated. I contacted a few former brewing students who I know, who have been guiding me in the process. Okay I’ve had one of them on FaceTime most of the way through so far. Yet, surprisingly, I’ve still managed to mess up, dramatically. But it’s okay, there’s beer at the end of this...at least we hope.
There are many ways to homebrew, but this is a method I was recommended by some fellow home brewers and my account of how it went.

Advertisement
Hide AdAdvertisement
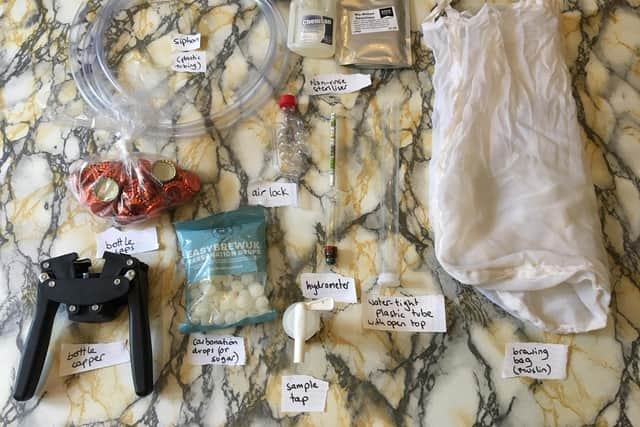
Hide AdI’ll start off with a checklist of what equipment you need – I went for a more low-budget option.
If you’re feeling particularly extravagant you could opt for something called the Grainfather which looks as intense as Marlon Brando’s iconic pose in the film I imagine it’s named after, but if you’re a first-timer like me, I reckon it’s best to test the hobby with cheaper kit because, as my brewing pal politely put it, ‘a lot can go wrong.’
You will need:
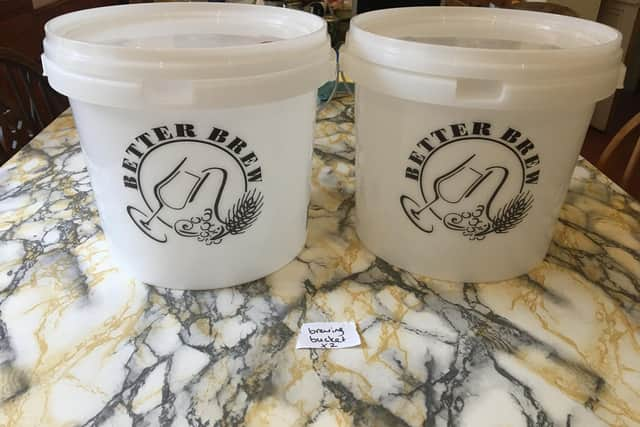
Two brewing buckets - one with a tap ATTACHED to it and make sure both come with lids with an air hole in each (between £8 and £20 each)

A siphon (plastic tubing to connect to the tap for transferring liquid. I didn’t know what it was at first, it sounded to me more like a weird string instrument - £5 to £10)
A brewing bag/muslin bag for soaking grains (£0.50 to £8)
An airlock to stick in the bucket used for fermenting to let Co2 escape (£0.99)
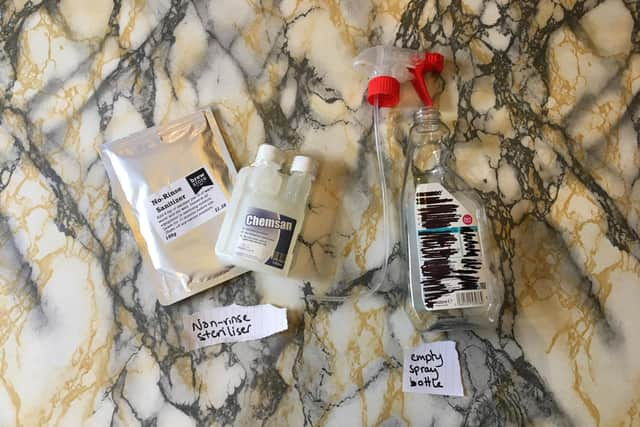
Non-rinse sanitiser (1kg £7.50)

Empty glass bottles (ideally 500ml)
Bottle caps (£1.90 for 100)
Bottle capper (approx £10)
Hydrometer to measure liquid density (approx £10)
A tall, narrow flask (approx 100ml) to put the hydrometer in for testing samples
A large stockpot (approx 10-12L)
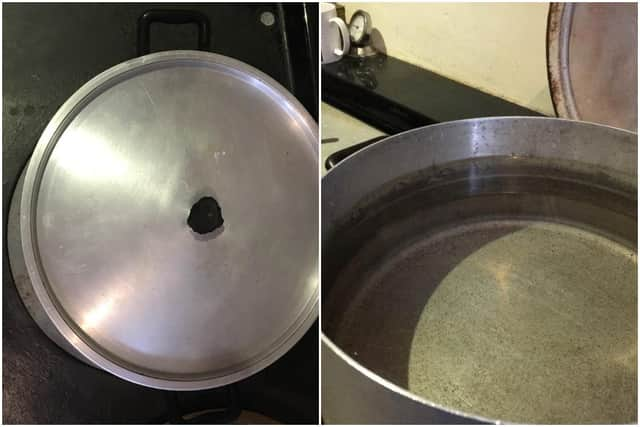

A lot of patience
First hurdle
I say bucket ATTACHED to a tap with deliberate emphasis on attached because this was hurdle number one for me.
I first interpreted instructions to buy a bucket with a tap as a bucket and a separate, single tap.
The excitement got me thinking way too literally.
Advertisement
Hide AdAdvertisement
Hide AdBut when said tap turned up on its own a light bulb came on and I realised I needed to attach it to one of the buckets.
In my defence, this is sometimes done in the homebrew community given you can buy these items separately online, it’s just certainly a less-convenient option and one I shouldn’t have gone for in hindsight.
Nothing a drill can’t help sort I thought. That was until I realised I didn’t have one at home and resorted to using a hammer and nail rather than choosing the more logical option of waiting until my neighbour was home to borrow his.
But it was 9am and he wasn’t due back until 6pm. Eager to make a start I carried on, filled with doubt about what was to happen next even the dog picked up on my nerves and gave me that concerned look.
Whoops
It was a disaster.
Advertisement
Hide AdAdvertisement
Hide AdThe hole looked like a square trying desperately to disguise as a circle.
The next half an hour was spent attempting to sand down the awful shape into a more circular hole for the tap using a stone from the garden. (It might be worth pointing out that I am in Aberdeenshire in the middle of nowhere and currently have no working car, so there was no popping out to the shops for sandpaper, or a drill for that matter).
If you’re learning anything from this article, just get a bucket with a tap attached, GET A BUCKET WITH A TAP.
Anyway, in went the tap eventually.
Check for leaks
Next, an important thing to do is fill your tap bucket with water to make sure it isn’t leaking ahead of the brew.
Advertisement
Hide AdAdvertisement
Hide AdMine leaked, atrociously, so it’s now being held together with duct tape (a lot of duct tape) which is miraculously working.
Success, bucket one ready for the brew despite looking worse for wear.
Your second bucket needs to have hundreds of small holes in the bottom because it’s going to act as a sieve in the process.
Again, ideally you would use a drill in this situation. But in my slightly precarious, drill-less position I ended up using a screwdriver and stabbed the living daylight out of the second bucket multiple times to create a similar effect.
Advertisement
Hide AdAdvertisement
Hide AdI wouldn’t advise using this method, health and safety would have had a field day.
But I have to admit, it certainly helped me blow off some steam from the tension caused by spending the best part of an hour trying to fit the tap into an awkward square.
Bram Stoker’s ‘we learn from failure, not from success’ certainly went round my head a few times as I laid out my clumsily-adapted kit ahead of the big brew.
With the buckets ready, you’re prepped for the next step.
Lessons learnt - buy a bucket with a tap already attached, and make sure you have a drill to hand, always.
Advertisement
Hide AdAdvertisement
Hide AdPart two coming up next will look at the grains I’ve chosen for the Christmas stout, how to prepare them and starting the brew process.
A message from the Editor:
Thank you for reading this article. We're more reliant on your support than ever as the shift in consumer habits brought about by Coronavirus impacts our advertisers.
If you haven't already, please consider supporting our trusted, fact-checked journalism by taking out a digital subscription.
Comment Guidelines
National World encourages reader discussion on our stories. User feedback, insights and back-and-forth exchanges add a rich layer of context to reporting. Please review our Community Guidelines before commenting.